Featured

ZYYX Stories – Anestetix

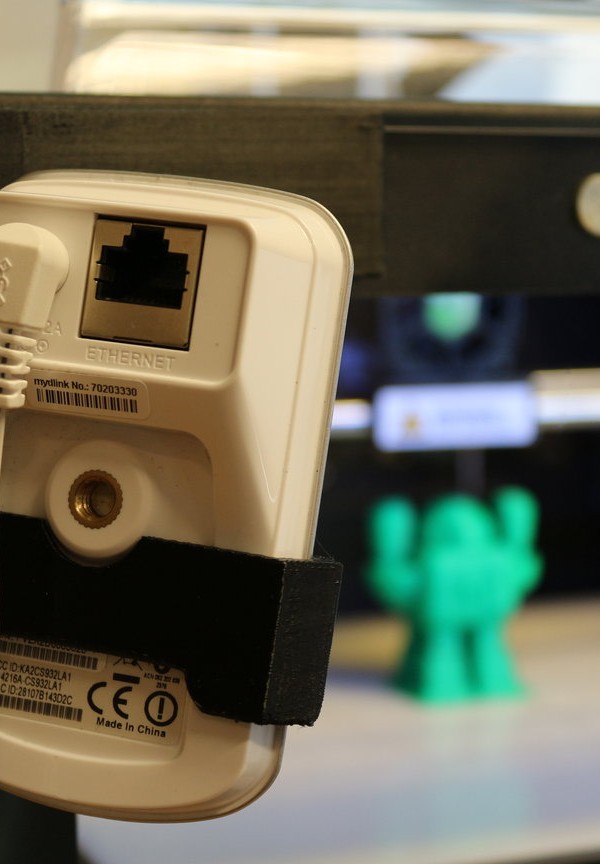
Philip Mittermaier, M.D. & CEO of Mittep AB, is a professional ZYYX user. In this video he talks about his product, Anestetix, and how he uses 3D Printing to develop and customize it.

Learn All The Tricks With Anestetix

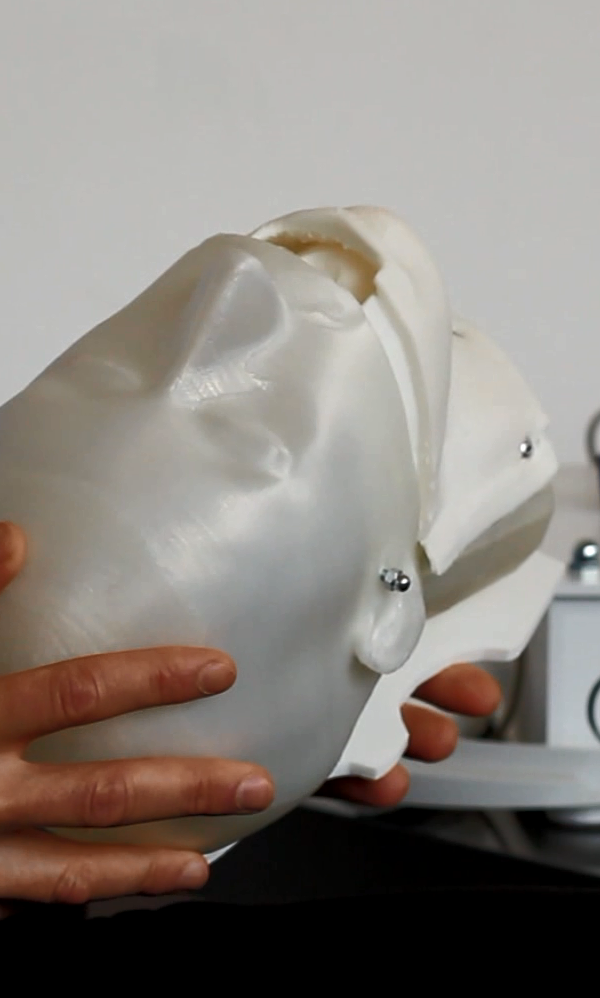
The Anestetix Intubation Simulator is a product of Mittep AB, an incubator business at the Sahlgrenska Science Park in Gothenburg, Sweden.

The Company is owned and driven by an anaesthetist.
Having observed many students and junior doctors struggle to learn intubation, the founders of Anestetix believed many of the available tools to be inadequate. They started to develop their own solution in close contact with students and educators.

Their solution, the Anestetix (TM) Intubation Simulator, has been developed since 2011 and has evolved from a hardware-dominated product to a software-based simulation application – without sacrificing functionality and adding user value and usability.

It is their goal to bring simulation to those requiring it: students, junior medical staff and medical staff that do not intubate regularly.

Their mission is to make intubation training more accessible and patient care safer.

The Anestetix (TM) simulator is a trademark of Mittep AB, Sweden.
Patents for the simulator are pending.

Philippjpg
Type2_1408221-287x300

Simplify3D Announces Version 3.0

Our partner, Simplify3D, just released version 3.0 of our awesome 3D printing software. With more than 40 new features, Simplify3D 3.0 is the biggest release since the software’s launch in 2013.

ZYYX_honeycombS3D1200

New ZYYX Printing Profiles:

We have worked hard to update all of our printing profiles for the ZYYX. This will improve print quality for your printer, giving you even better prints. The new Simplify3D 3.0 has even more features, including notification of new profile updates, allowing you to always get the best out of your ZYYX.

IMG_7883

Infill options galore:

Simplify3D now boasts six infill pattern options, including the popular honeycomb and triangle. The new variety of patterns allows users to configure the interior of their part exactly how they want it, whether the goal is to achieve high strength requirements or stunning aesthetic results.

Simplify3D-Infill-Options-2

The fastest slicer gets 3x faster:

Simplify3D has always been known as the fastest slicer available. Now, new state-of-the-art algorithms in Version 3.0 result in slicing speeds more than three times faster than the previous version. This enables an impressive time savings compared to other 3D printing software. Faster slicing helps with complex models and multi-part jobs, as well as allowing for quicker iteration. Combined with our realistic animated Preview Mode, this allows our users to make small settings changes and instantly see how the final print is affected.

User-friendly interface updates:

The interface has been revamped so that frequently used tools are more intuitive and easier to use. Model manipulation is simpler than ever before, and new grouping options make it incredibly easy to work with multiple parts. An “undo” button saves time and frustration, while new keyboard shortcuts improve navigation. The Preview Mode has also been enhanced with multiple coloring options, so users can visualize their build sequences by speed, active toolhead or feature type.

Simplify3D-Interface-Updates

New settings boost quality:

Simplify3D 3.0 provides dozens of other new features to improve print quality, such as Avoid Crossing Outlines, which alters the movement of the toolhead to reduce excess oozing, and Non-Stationary Retractions, which helps to reduce defects (a.k.a. “blobs” or “zits”) on the outer surface of the print. These fine-tuning controls improve even the most challenging prints and make the difference between a good print and an excellent print.

Simplify3D-New-Settings1-300x225

Smarter printer profile system:

Anyone who has modified their print settings to get the best results knows the importance of saving successful settings. Simplify3D 3.0 provides a brand new printer profile system that simplifies the process of adding and saving profiles. For owners of multiple 3D printers, this streamlined profile system greatly simplifies the workflow. In addition, to ensure the profiles are always up-to-date, the desktop software communicates with a new cloud-based storage system to receive instant updates for the hundreds of pre-configured printer profiles that are available within Simplify3D.

ZYYX Maintenance Kit How To

The ZYYX Maintenance Kit is a one-stop solution to keeping your ZYYX Print Head in great shape for hassle-free printing. The Kit includes, among others, a special cleaning filament and an automatic print head cleaning sequence engineered by the team behind the ZYYX. The Kit is available for purchase at the web shop for only €35.

Visit our >web shop< for purchase. Please view our instructional video for a guide on performing the Maintenance.

Package Contents

4m ZYYX Cleaning Filament; 5pcs ZYYX Nozzle Cleaning Sticks; 4pcs ZYYX Cleaning Brush, including holder; 1pc ZYYX Spring Removal Tool

Kit_contents

Automatic Nozzle Cleaning/Maintenance

Even though the ZYYX nozzle is known for its stable operation, nozzle cleaning at an interval of about 4-6 weeks can prolong its life and prevent future clogs, as well as fixing some blockages. The cleaning is performed with the special ZYYX cleaning filament.

The script can be downloaded >here< and should be put on an SD card for use.

Automatic Nozzle Cleaning

The automatic nozzle cleaning is based on the concept of “cold pull”, wherein an experienced user can perform a number of manual steps to clean the inside of the nozzle.
Your ZYYX 3D Printer can now perform this sequence automatically, and we have tuned the sequence to work exceptionally well with our ZYYX cleaning filament.

The Nozzle cleaning script should be repeated until the ejected nozzle plug looks clean. This ensures that all contaminants are removed.

Nozzle Plugs

Extruder Feeder Maintenance

The feeder wheel will get dirty from plastic residue and should be cleaned once every 3-4 weeks. The ZYYX Maintenance Kit contains brushes that are perfect for such work.

Feeder Wheel Maintenance

Nozzle Blockage Removal

If you have a complete blockage of the nozzle and the automatic cleaning did not fix it, you can use the heavy artillery – our ZYYX Nozzle cleaning sticks.

Nozzle Blockage Removal

Filament Blockage Removal

Sometimes the blockage is a piece of plastic stuck in the entry hole of the hot end. This is usually the case if the extruder stops feeding soon after loading the filament. To remove such a blockage, the extruder arm must be removed. The Kit comes with a tool to easily remove the tension spring, and the arm is removed by unscrewing a single screw.

Filament Blockage Removal

ZYYX + Colorfabb Filaments = True

We decided to showcase some of the great speciality filaments from Colorfabb. These materials make it possible to explore surface finishes in a whole new way.


For schools and artists, the flexibility to create variating surface finishes and simulating different materials is every important. By having few safe, quiet and reliable ZYYX+ 3D printers running in the classroom you can really enables your students and artists to express themselves like never before. Thanks to the simplicity of ZYYX+, you allow for a pure focus on creativity and expression.


For demonstrating surface finishes we chose a Vase design of ours that is aimed for Vase mode functionality in Simplify3D. The model can be downloaded >here<


The difference in texture, feel and look from the same model, same 3D Printer but different filament is impressive!

colorfabb_vases

The filaments, from left to right, are:

XT-white
- Printed with our ABS profile

Woodfill Fine
- Printed with our PLA profile

Bronzefill
- Printed with our PLA profile, speed adjusted down to 2000mm/min

XT-clear
- Printed with our ABS profile

XT-CF20
- Printed with our ABS profile, speed lowered to 2000mm/min, and cooling fan on from layer 3.

Glowfill
- Printed with our PLA profile


All prints were made in Fast mode (0.3mm layer thickness) with Vase mode, 2 bottom solid layers, and extrusion width increased to 0.8mm.


Increased extrusion width is a good way to get nice vase mode prints. It gives the layers a better ability to cope with sloping walls due to the increased wall thickness and adds strength to the print.


Learn more about ZYYX+ here

The ZYYX 3D Printer just got even smarter!

Update: You can now upgrade your original ZYYX with the features described below. (More info here.)

Today we are releasing the new and upgraded ZYYX 3D Printer. This release will make it even simpler and safer to print with your ZYYX. Nothing beats a video if you want to explain something, so here you go:

The ZYYX Filament Monitor is an add-on that detects problems with the filament and triggers the printer to pause, allowing you to fix the issue and keep on printing. This may sound obvious, but up until now it was difficult to find this feature in a desktop 3d printer.

filament_monitor_overview_

When beta testing the filament monitor, we quickly realised that it is not necessary to load the same color as was in use. This opens up a new type of print – the “patchwork print”. If you need to complete a print and realise you don’t have enough filament of one color, it’s no problem – just continue with another one. And it looks quite nice! This concept can also be used manually. In the printers on-board menu you can select “Pause at ZPos”, and the printer will pause, allowing you to change the filament and continue printing.

marvin_banner_txt
filament_monitor_back_table

The ZYYX Filament Monitor is a module that fits on the back of the printer. On all printers ordered from today, this will be standard. For all current users, the ZYYX Filament Monitor will be available for purchase on our webshop and retrofits to any ZYYX 3D Printer.

filament_monitor_close_big

The new features are made possible by an updated Sailfish Firmware. We have worked closely with the team behind this open source firmware. In addition to the more prominent features, there are other smaller changes. Print quality is improved due to an optimised acceleration implementation. This results in less bumps and surface defects.

Vase_surface

The ZYYX Camera! Check your print any time, anywhere!

IMG_1762

The following post is a guide to printing and mounting a D-Link camera on your printer. This is great if you want to watch your printer and its progress any time, anywhere!

1. Preparation

The first thing you will need is a D-Link camera. We use the DCS-930L, and the design we have made is for this specific model. You will also need to pick your preferred plastic filament. We recommend black PLA. The final items required are good double-sided tape and, of course, your ZYYX 3D Printer!

2. Printing

Once you have prepared your printer, you must prepare the file! You can download the two models here (Camera_holder ZYYX_tag).

One of the designs, the actual holder, is printed with rafts and supports. Therefore, after the print is done you must remove the excess material. The ZYYX-tag is printed with without supports or rafts to create a smooth surface, allowing the tape to stick more effectively.

Sliced
Sliced again
rsz_img_1775

3. Assembly

Once you have acquired all of the components, you must assemble the product! On the backside of the ZYYX-tag you just printed, apply an appropriate amount of double-sided tape. (See picture below.) After you have applied the tape, you’re ready to mount it on the printer. Set the ZYYX-tag so that it aligns with the inner edges of the printer, and make sure that it is attached securely. (See picture.) Put the camera in the holder and mount the holder onto the tag. (See picture.)

rsz_img_1969
rsz_img_1966
rsz_img_1972
Namnlös
rsz_img_1747
IMG_1762

4. Connecting

Your camera is now set up and almost ready to use. To start using your ZYYX Camera, you will need to set up an account at MyDlink. With this, you will be able to enjoy your printer’s creations from your phone, tablet or computer any time, anywhere!

Video: The Company Behind the ZYYX 3D Printer

Published on December 18, 2014

Thank you for watching!

If you are interested in the ZYYX 3D printer or 3D printing in general, subscribe to the channel!
You can also find us through the following links:

Website: http://www.zyyx3dprinter.com/

Facebook: https://www.facebook.com/zyyx3dprinter

Google Plus: https://plus.google.com/u/0/

Instagram: http://instagram.com/zyyx3dprinter/

Linkedin: https://www.linkedin.com/company/5241

Links to designs not made by the ZYYX Team:

Toy Dump Truck
http://www.thingiverse.com/thing:537153

OpenRC 1:10 4WD Truggy Concept RC Car
http://www.thingiverse.com/thing:42198

Classic Chess Set from glChess
http://www.thingiverse.com/thing:322616

Chainmail
http://www.thingiverse.com/thing:45203

Low-Poly Charmander
http://www.thingiverse.com/thing:323038

Low-Poly Bulbasaur
http://www.thingiverse.com/thing:327753

Low-Poly Pikachu
http://www.thingiverse.com/thing:376601

Large “Print-in-place” Ball Bearing (Ø145mm)
http://www.thingiverse.com/thing:520238

Zombie Hunter Head
http://www.thingiverse.com/thing:69709

Sierpinski Pyramide
http://www.thingiverse.com/thing:204503

5/16-18 Bolt And Nut
http://www.thingiverse.com/thing:71968

Twirlbrltt
http://eyesofanother.com/bracelets.html

Toy Car with turning wheels
http://www.thingiverse.com/thing:21214

Stretchy Bracelet
http://www.thingiverse.com/thing:13505