
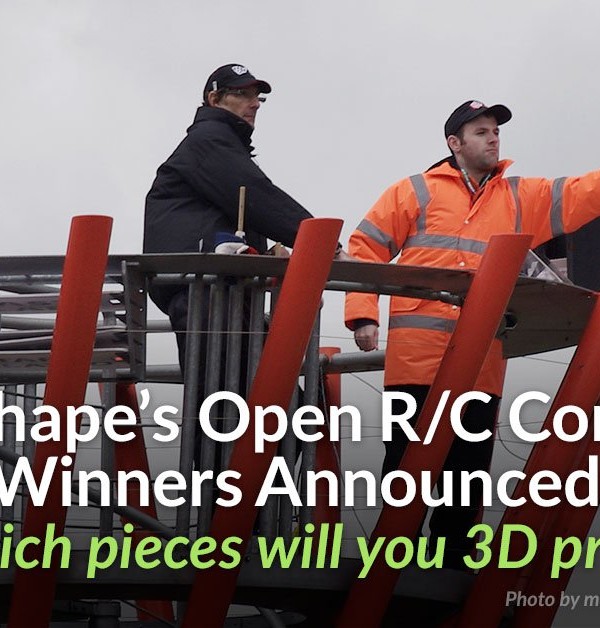
The winner of the Open RC F1 contest has an awesome blog and just posted a great review of the ZYYX+ 3D Printer.
Check it out here:
http://makitpro.com/index.php/2016/05/16/zyyx-3d-printer-review/


The winner of the Open RC F1 contest has an awesome blog and just posted a great review of the ZYYX+ 3D Printer.
Check it out here:
http://makitpro.com/index.php/2016/05/16/zyyx-3d-printer-review/
For the 15th year SmartGeometry (SG) has gathered a global community of innovators and pioneers in the field of architectural design with computational tools. This year the architects were paired with experts outside the field of design such as cognitive scientists and chemists. Purpose? To collaborate on some of architecture’s most challenging problems.
Information technology has introduced new potentials for building designers and SG is at the forefront in the exploration of this territory. Computational design and digital manufacturing are creating changes in the design process, often shifting the boundaries of disciplinary roles. At SG 2016, designers and researchers operated between, across, and at the edge of their own disciplines. They challenged how they work and connected and borrowed from other disciplines, thereby collaborating to solve complex and connected problems.
This year Magicfirm Europe AB was invited to support the conference with ZYYX 3D Printers. Nine printers ran more or less around the clock and were used for a variety of purposes in the different clusters:
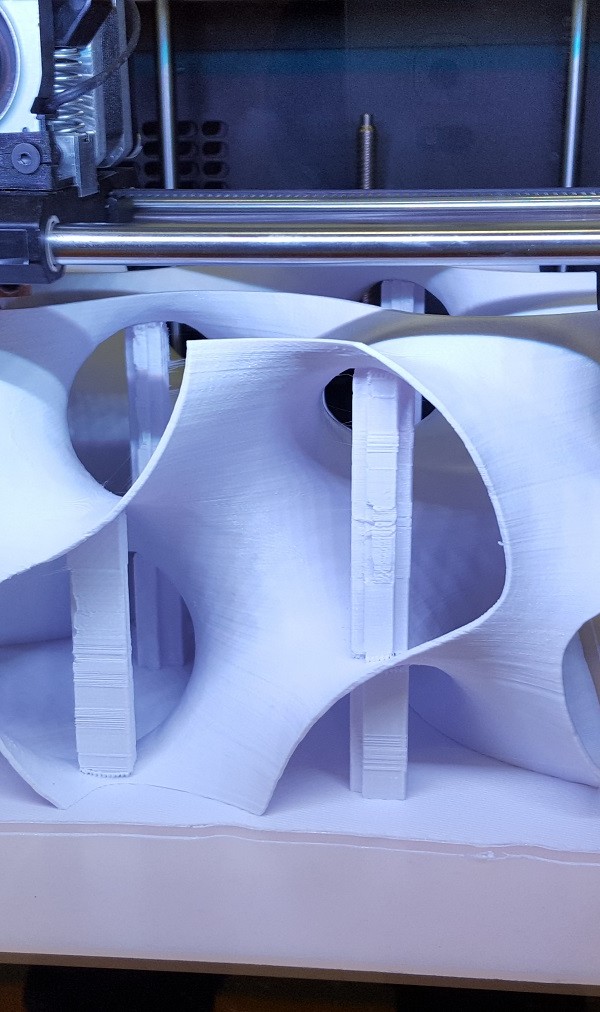
The purpose of the “Sensory Detective”-cluster was to question the dynamics of heat, moisture and air within an atmospheric pavilion and to design modular architectural elements and experience their effect. The intricate design of several of these elements could be brought into existence through the help of 3D Printing.


The “Nano-Gyroids”-cluster was a collaboration between architects and crystallographers to bring nano-structures of chemistry into the world of architecture. These structures were then evaluated with the help of 3D printing.
At the other end of the scale, the “Calibrated Modelling”-cluster used 3D printing to quickly iterate through different component designs that would allow them to install their real-life prototypes in the workshop hall.
“Atmospheric Delight” investigated how biometric data could be used to control the micro climate of a room in order to satisfy the different needs of different individuals. In this cluster, 3D printing was used in a very practical way: To create components such as casings for Bitalino circuits and to build lamp-holders.


investigated how to perform collaborative work on digital designs and 3D printing was used to evaluate whether the result would hold.
A different type of 3D printing was used in the “20000 Blocks”-cluster wherearchitectural models were designed in Minecraft, the computer game, and then constructed from wooden cubes using a robot!

Xavier De Kestelier and Samuel Wilkinson of SmartGeometry: “The ZYYX 3D Printers have been really reliable and helpful in our work during the SmartGeometry conference; we certainly kept them very busy! “
Anders Johansson, CMO of Magicfirm Europe: “We are extremely proud and happy to have been part of this unique and innovative conference. This is a far cry from printing toys or technology for the sake of technology; this is 3D printing being used as a vital tool in progressive and collaborative research.”


We knew we would get some amazing entries for this contest but we were blown away by how many awesome entries we received! Thank-you to all those who entered and submitted their designs! Our judges had a very tough job deciding on the top 10 designs but they based their scores on creativity, technical excellence, and presentation.
Without further ado, here are your Top 10 Winners for the Open RC Accessory Design Contest!
Race Car Driver and Helmet by Flashsolutions

Imagine yourself in the drivers seat of an F1 car! Flashsolutions did just that by scanning their own bust and creating this compatible race car driver helmet and visor.
Bull Horn Hood Ornament by Ryan van Waes

The judges loved the creativity of this design – a bull horn ornament that fits right into the nose of the RC. Great work by Ryan van Waes.
Open RC LaserDesigned by keilum griffin

Keep your enemies in the dust with this laser attachment! Great design which makes for a quick print and keilum griffin included his print settings.
Open R/C F1 body kit 2 by a_kuhta

How awesome is this body kit!? It’s very Open RC meets Dark Night – Great design work by a_kuhta
ORC Grand Tourer by Isotalo

Another great body kit design by Isotalo! It can be mounted to the F1 car chassis with M3 screws.
led Rally light accessory for open rc formula 1 by delukart

A functional LED light so you can take your RC out at night! Nice work by delukart who also left instructions on how to install the lights on the design page.
Open R/C F1 Bumper Car Kit by PIPE AGUIRRE

We love the bumper cars when we were kids, and now PIPE AGUIRRE has recreated that experience with the F1 RC car! He has included recommended material for each part of the bumper kit.
OpenR/C Speed Boat Accessory by MakersPlace

We love the creativity behind this design! MakersPlace designed a 4 part accessory kit to take the RC from speed car to speed boat! Don’t forget to make the parts watertight.
RS-01 OpenRC F1 Adjustable Suspension Chassis by brett turnage

This design was well thought out and very technically sound! Great work by brett turnage who also demonstrated the accessory in a few Youtube video’s.
OpenRC F1 DRS system by makit

For those who want their RC to be as fast as possible, this DRS (drag reduction system) is build to reduce aerodynamic drag to give you optimal speed! Great work by makit on making it easy to print and technically functional. All the instructions are broken down on the design page.
Thanks to Pinshape for hosting the contest and again congratulations to all our winners!
For the last 45 days we have been running a competition with Pinshape revolving around the Open RC F1 car. A great 3D printable design by our friend and partner, Daniel Norée.
The theme has been: Put a “spin” to the classic R/C Design with accessories! Link to the contest here.
Remember that the competition ends on:
March 15, 2016 at 23:59:59 PST.
So go and hand in those great accessory ideas on Pinshape right now and have the chans to win a brand new ZYYX+.

We are really happy with the turnout so far!
A lot of fun, serious, crazy and cool designs have already been uploaded to Pinshape and entered the competition. The three judges really have their work cut out for them, Mats Moosberg (Magicfirm), Daniel Noree (3D Designer & Creator of Open R/C) and Chris William Halliday (Pinshape Ambassador).

Step 1
Design any car accessory that is compatible with the holes in the updated Open RC design files below
Step 2
Once you’ve designed your accessory, upload it to Pinshape and make sure to check the “Submit this model to the Open R/C Accessory Design Contest” box on the upload form.
More information here.
Creativity : 40 points
Overall design quality, uniqueness, intricacy and detail
Technical Excellence : 40 points
Compatibility with Original R/C F1 design, ease of printing on FDM 3D printers
Presentation: detailed description : 20 points
What settings should be used to print?
High-quality pictures and tags


Our team in Gothenburg, Sweden, is happy to announce the release of the new ZYYX+ 3D Printer, a follow-up to the ZYYX 3D Printer.
The first ZYYX 3D printer was developed with focus on reliability, ease-of-use, making it fume free and quiet. Why? This was lacking in the existing 3D printers. With the new ZYYX+, our objective has been to surpass our competitors when it comes to print quality.
The moving parts around the print-head are all aluminum, which increases stability and reduces vibrations. This will improve the print quality and extend the lifetime of the printer.


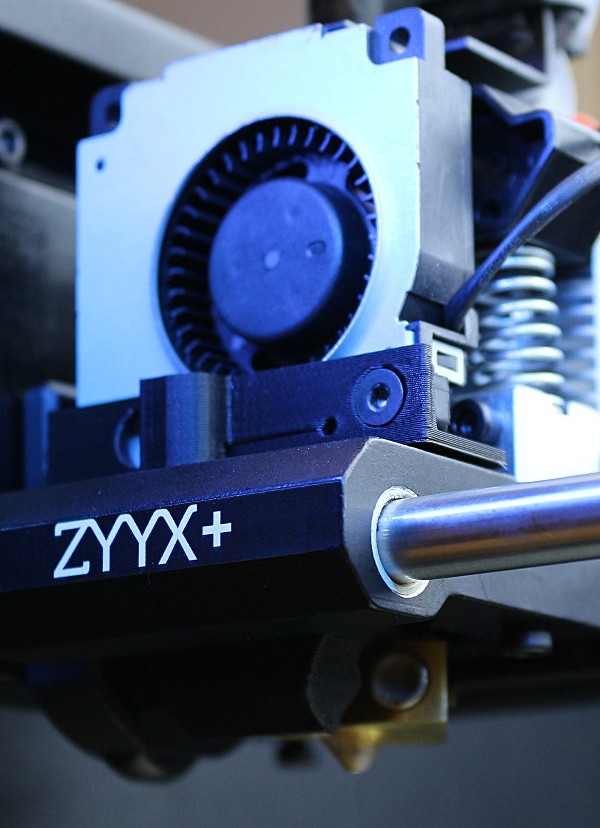
A new and stronger print fan has been introduced. The design and the mounting allows for an easy access of the feeder mechanism when doing maintenance. Furthermore; the print fan speed can now be adjusted directly in Simplify 3D.
The motion planner algorithm and the extrusion algorithms have been redesigned, with the purpose of removing vibrations and improving retractions. The result is an increase in the quality of finer details.
So what about heated bed? Thanks to the closed chamber and the excellent adhesion of the ZYYX building plate you get ABS prints fully on par with what you get from any heated bed. The beautiful “Aria the Dragon” by Louise Driggers to the right here is printed with our proABS at medium print quality(0.2mm layers).

The ZYYX+ is fine-tuned to fit our new ZYYX proFilament line; the ZYYX proABS, the ZYYX proPLA and the ZYYX proFLEX.
The ZYYX+ of course work with other filaments but the ZYYX proFilaments will increase the reliability and the quality of your prints.
The ZYYX proABS is our ABS blend that performs well with our build plate and has minimal warp, due to the polymer mix.
Our proABS is excellent for printing prototypes or production parts that are exposed to medium mechanical stress.
The surface of a ZYYX proABS print will be matte.
The Computer Fan Concept Model by Creative Tools is printed in ZYYX proABS.


The ZYYX proPLA is our PLA blend that ensures stable overhang performance and excellent surface quality, due to controlled viscosity in the cooling phase.
PLA is used as the first choice for prototyping and producing parts that will not be exposed to thermal or high mechanical stress.
The surface of the ZYYX proPLA will be semi-glossy.
The Lid part of the openR/C Formula 1 Car by Daniel Norée is printed in ZYYX proPLA.
The ZYYX proFlex is our pro grade Flexible filament suitable for printing everything from shoe soles prototypes to RC Car tires. It has an hardness of approximately 85A, and by setting the infill percentage and number of shells in our pro Profiles for Simplify3D the hardness of the printed model can be varied depending on application.
When printing with proFlex we strongly recommend use of our ZYYX Soft Spring to ensure stable extrusion.
The Palmiga Sandals by Thomas Palm is printed in our ZYYX proFlex.

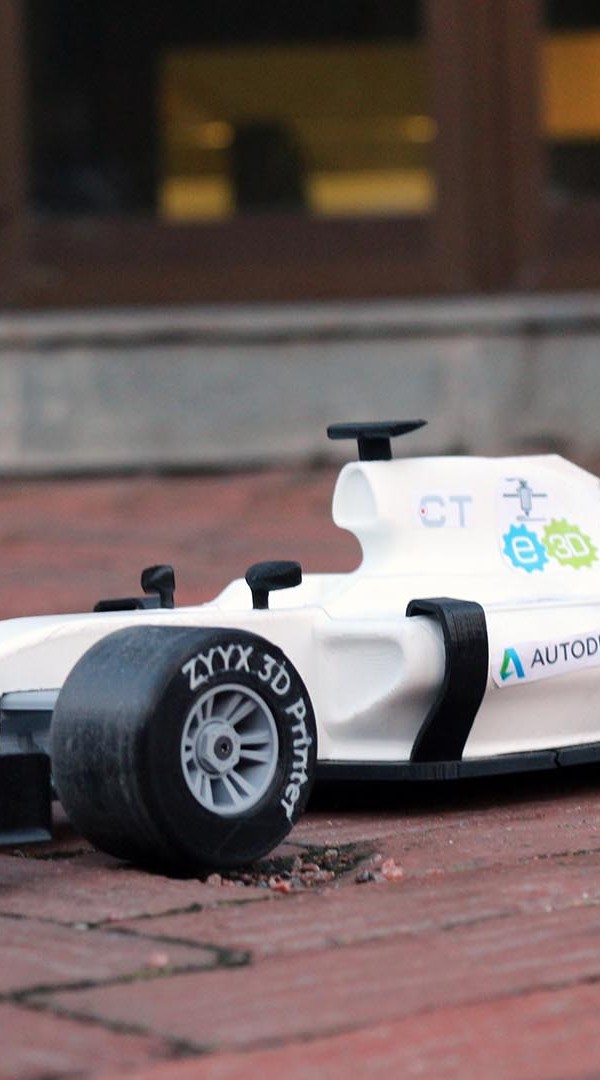

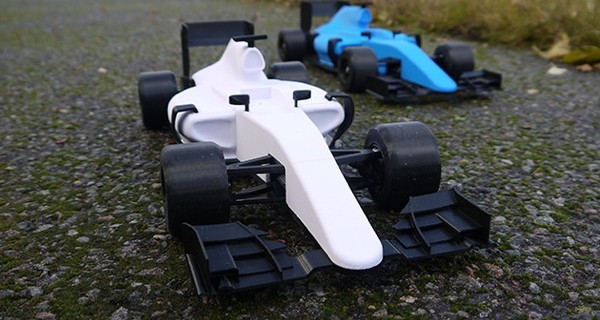
Daniel Norée, Mechanical Industrial Designer and engineer at Creative Tools and founder of the OpenRC project, recently released his latest creation, the OpenRC F1 3D-printable race car. Daniel has done an astonishing job of designing this epic RC car, and we are very impressed by the detail and design of the vehicle.
As one of the sponsors of the project, we made sure that Daniel had the best tools at his disposal; the development of the OpenRC F1 was completed using a ZYYX 3D printer.
We printed the car in PLA and the tires in NinjaFlex, and, for an even more realistic look, we added the ZYYX name on the side of the tires using the multi-material feature of the ZYYX 3D Printer.
We installed the recommended electronics and fired it up to do some laps and doughnuts. Let’s just say it was a blast both printing, building and driving the OpenRC F1!
For more information about the F1 project and OpenRC please visit:
Pinshape for the print files and instructions on how to print it
The OpenRC web page for more in-depth information about the project
And don’t forget to vote for Daniel Noreé in the Pinshape Awards!


We try to push the boundaries of what you can do with a ZYYX 3D Printer every day, and one such boundary is multi-color and multi-material printing. We can now give you, as a ZYYX user, the freedom of multi-color and multi-material with just a firmware upgrade!
We have created a system, together with Simplify3D, that allows you, the ZYYX user, to create colorful and complex creations with the machine you already have, or, as a potential buyer, the machine you will soon purchase!
This is all done by creating individual processes in Simplify3D for each part of the model and telling Simplify3D to use a new material for each of these processes.
You can assign different print profiles to different parts of your print, allowing for embedded parts in not only a different color, but also a different material.

This London underground-inspired creation is done in four colors of PLA, all in one print. Since it is planar, no special treatment of the design is needed; you just need all colors to be separated into different stl files.
Model available at http://www.thingiverse.com/thing:1044052

The ZYYX Cardholder was divided into five parts. The bottom base was printed in black Ninjaflex Semiflex and the rest in PLA. This model contains color changes in the middle of the print. To avoid the print head hitting the arms while printing the logo parts, the body part was divided into arms and base. The printer will thus print the arms after the logo parts are completed.
Model available at http://www.thingiverse.com/thing:1043987

The ZYYX Watch band was printed with NinjaFlex for the flexible bottom parts and PLA for the rest. Here we switched to our ZYYX Soft Spring while printing the Ninjaflex and then switched back to the normal spring for the rest.
Model available at http://www.thingiverse.com/thing:1044030

The ZYYX Sandal was printed in TPE from 3DPrima. The curved part of the surface needs to be rotated so that the upwards slope is facing back to ensure that the print head does not hit the previously completed part while printing the ZYYX logo.
Model available at http://www.thingiverse.com/thing:1044006

Here is an example sliced model, in this case the ZYYX Cardholder model.
The print is divided into four parts: the base is printed first (visualised blue), then the ZYYX logo part (green) and logo text (yellow), and finally the arms (orange).
We made a video tutorial that will get you started in printing with multi-color and multi-material. Keep in mind that this is an advanced function and that you need to understand the limitations and usage ideas before printing in practice!
The new firmware will be available for download from our site, and new profiles available from Simplify 3D, beginning 2015-10-02. This is all you need to start printing in multi-color and multi-material. Happy printing!
Today we are releasing the ZYYX Firmware upgrade tool which enables all our users to take advantage of the continuous improvements and fixes we implement.
To make this service complete, we have also decided to release the design of the ZYYX Filament Monitor open source, making it possible for our users to upgrade their machines themselves.

The firmware upgrade is available here.
The ZYYX Filament Monitor design is available for download at http://www.thingiverse.com/thing:983193
You can buy the non-printable parts now in our webstore, where we also have a complete kit available.

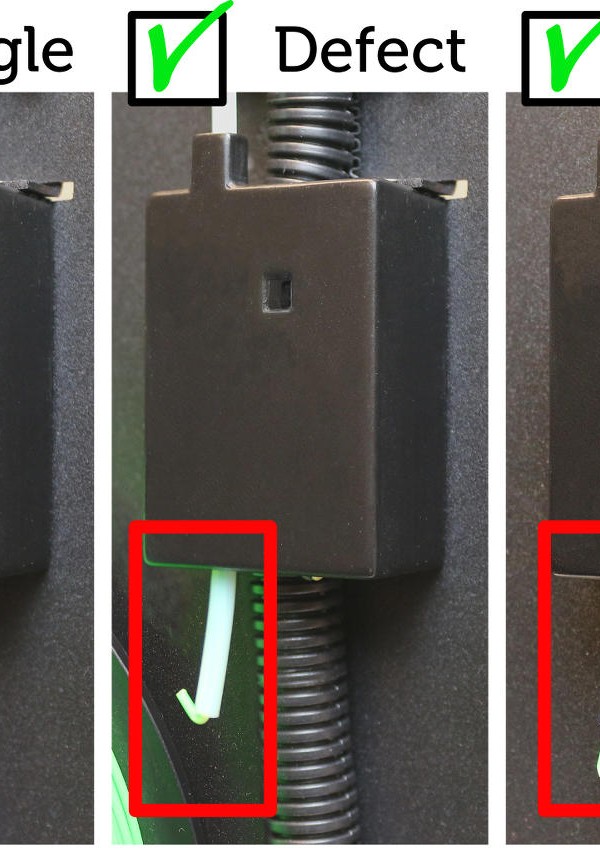
When testing various flexible plastic filaments, we have seen that the softest of them, such as Ninjaflex, have a tendency to creep out of the extruder when extrusion speed is increased. After an analysis of this scenario, we discovered that a major cause of the creep is the spring-loaded arm compressing the filament to such degree that its trajectory is curved.
Since we have an extruder with open architecture, we decided to test simply putting a softer spring in place. This produced such positive results that we have decided to release the soft spring as an accessory.

In these two pictures you can see that the soft spring does not bend the filament, making extrusion of soft filament more reliable and enabling higher speeds.


The Soft Spring is installed by removing the front fan and using the Spring removal tool to put the spring in place. We have added a red marker to ensure our users remember to change back to the original spring in order to reliably print other types of filament!
As a starting point, you should use the predefined ZYYX TPE/proFlex Material setting in Simplify3D. This will work for most types of flexible filaments. Most important is to print slowly and with the correct temperature. Even with the Soft Spring, if you print too fast or at too low a temperature, the extruder can still jam, causing soft filament to creep out of the side.
Before loading a soft filament, it is extremely important to ensure the extruder is in good condition. This can be done by performing a couple cleaning cycles with our Extruder Maintenance Kit.
When loading the filament, ensure you have preheat set to at least 230 degrees, otherwise the filament might creep out while loading. If you fail to load the filament, try to perform a nozzle cleaning sequence to ensure the nozzle is absolutely clean.
Some stringiness will occur in the prints. This can, in some cases, be reduced with a retraction at slower speed – around 400 mm/min.
By printing small test objects you can fine-tune the surface finish by lowering temperatures, but in this case you must monitor the print closely and cancel if you see indications of jamming or filament creep.

ZYYX Ball, printed in TPU.
Model at http://www.thingiverse.com/thing:996962.

Palmiga Innovations Sandal, printed in Palmiga innovation conductive TPU.
Model at http://www.thingiverse.com/thing:429902

Open RC Tire, printed in NinjaFlex.
Model at http://www.thingiverse.com/thing:240970

ZYYX Robot, printed in NinjaFlex.
You can purchase the Soft Spring and spring removal tool at our webshop for €10.
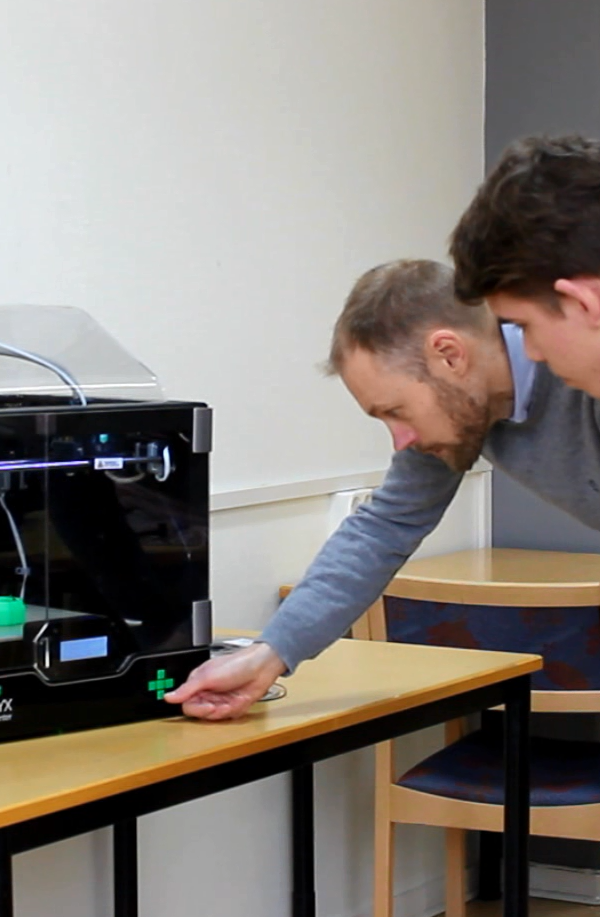
Every year at Gothenburg Technical College, students in their final year have the possibility to create a company around an product idea. The students go from an idea and the drawing-board to mock-ups and prototypes to, finally, a finished product. They learn about different methods of product development, CAD, 3D Printing and rapid prototyping as a part of this process.
Rapid Prototyping consists of several types of techniques used to rapidly fabricate models and prototypes using CAD (computer-aided design). At Gothenburg Technical College, students use a CAD file to 3D print a model, decide what changes need to be made, alter the CAD file, and then print a new model – all in a single day.
Last year’s students, Christoffer Karlsson and Roxanne Farspour, are two founders of EchoLogic UF, a company whose mission is to help Swedes recycle milk cartons. You can see their finished product in the video above. They used the ZYYX 3D Printer in their design process, ensuring that the product had good grip, correct measurements and functionality.
This is a great way to teach a new, modern design process. As Johan says in the video, “With a 3D Printer it is very easy to help them (students) with their creativity, so they can see a result of their idea…”

