|
<< Click to Display Table of Contents >> Slicing a First Print File |
  
|
|
<< Click to Display Table of Contents >> Slicing a First Print File |
|
When the Simplify3D and the ZYYX profiles are installed you can "slice" your first print file.
"Slicing" is the process necessary to convert a 3D model into a file that can be understood by the 3D printer.
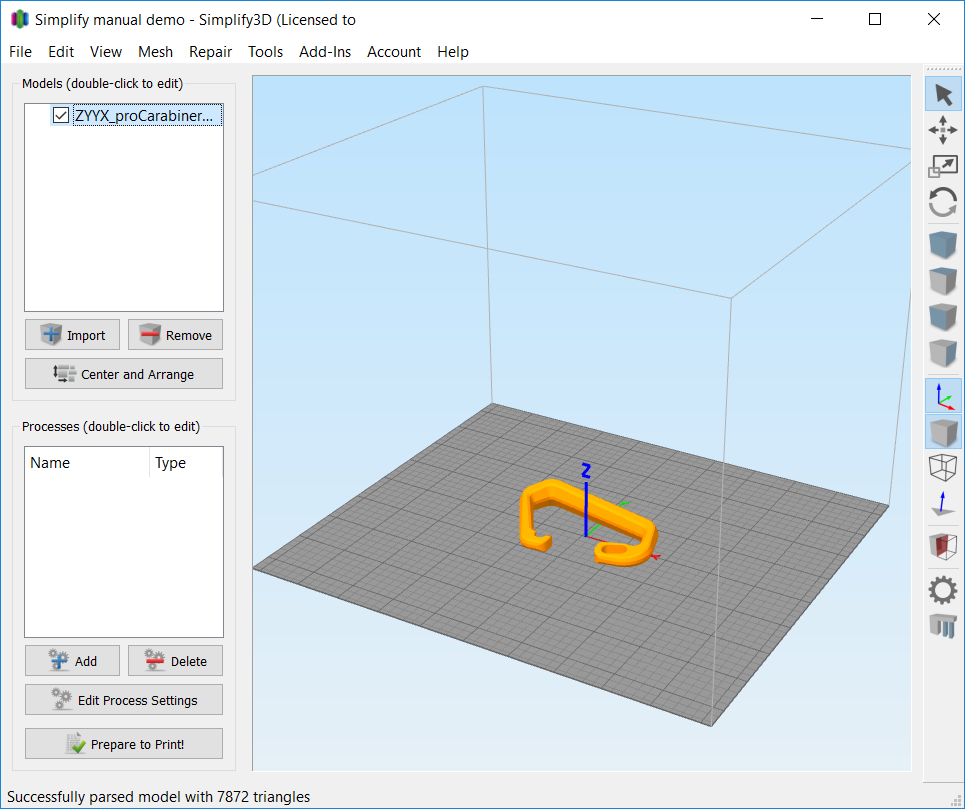
1. Adding a model Click the Import button and select an STL file that has been exported from your CAD software. Click open. In our example the ZYYX proCarabiner is used. The model may be reviewed and manipulated using the Tool Bar options (listed vertically on the right side of the window). |
|
2. Placing the model on the print surface
Depending on how the STL file was exported, you may need to place it in a suitable position for printing.
Do this by marking a suitable surface on the model and pressing CTRL-L (=menu Edit - Place Surface on Bed). You may also use the Center and Arrange button.
Doing this wisely may save trouble and time when printing and reduce the need for support structures.
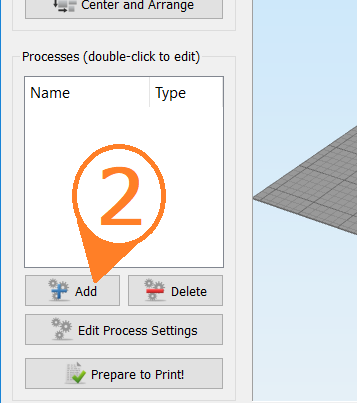
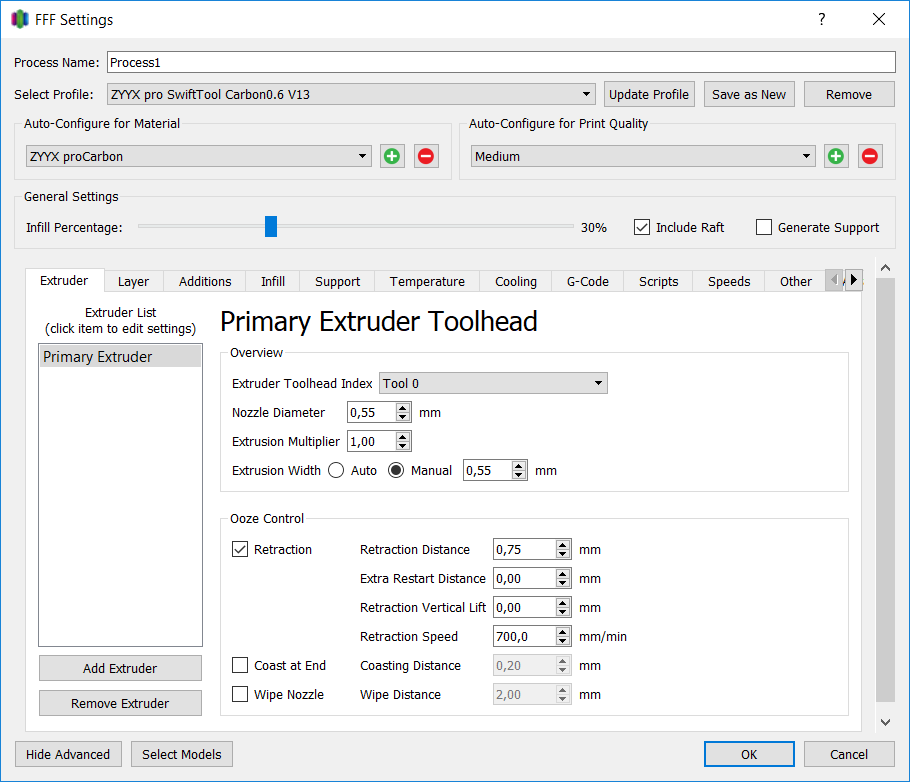
3. Adding a process and selecting profile Click Add to see the FFF settings screen as shown to the right.
|
|
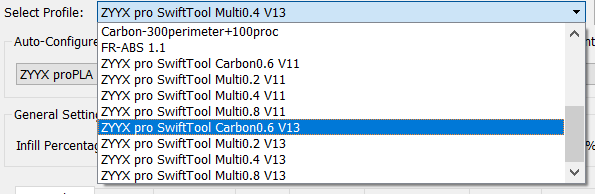
4. Selecting profile Select the profile for the SwiftTool nozzle that you will use. In the example, the Carbon0.6 is chosen to print with proCarbon filament. Please note that ZYYX pro profiles are not compatible with ZYYX+ or ZYYX Classic machines, and vice versa. |
|
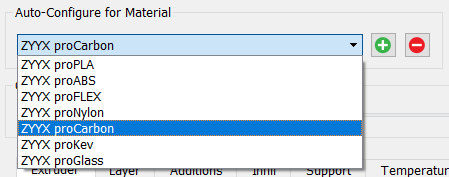
5. Selecting material / filament Select the filament to use for your print. In the example proCarbon is chosen. It may be useful to check the table in section Printing to know what materials to use with which profile.
|
|
6. Other process settings There are many different settings that can affect the print result. Most are automatically selected by the profile, but there are some important ones on top, as highlighted in the picture to the right. |
|
Print Quality: Controls vertical resolution. The medium setting is usually sufficient. A fine quality print takes roughly twice the time to print compared to a medium.
Infill Percentage: Decides how much material will be used inside massive parts. A lower number gives faster prints, a higher usually gives stronger parts.
Include Raft: Adds a plate below the print. This is default for all ZYYX profiles and gives better adhesion and quality.
Generate Support: Add support if your model has flat overhangs or other complex structures that e.g. begins in free air, and has no natural attachment from the build-plate and all the way up.
Below these four settings, there are many more settings that may be useful for an expert user. Use of the ZYYX profiles optimizes all these automatically.
Click OK to close.
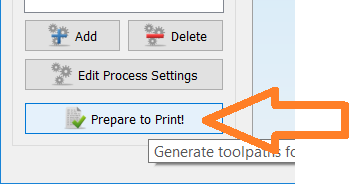
7. Creating the sliced model Click the button Prepare to Print!. |
|
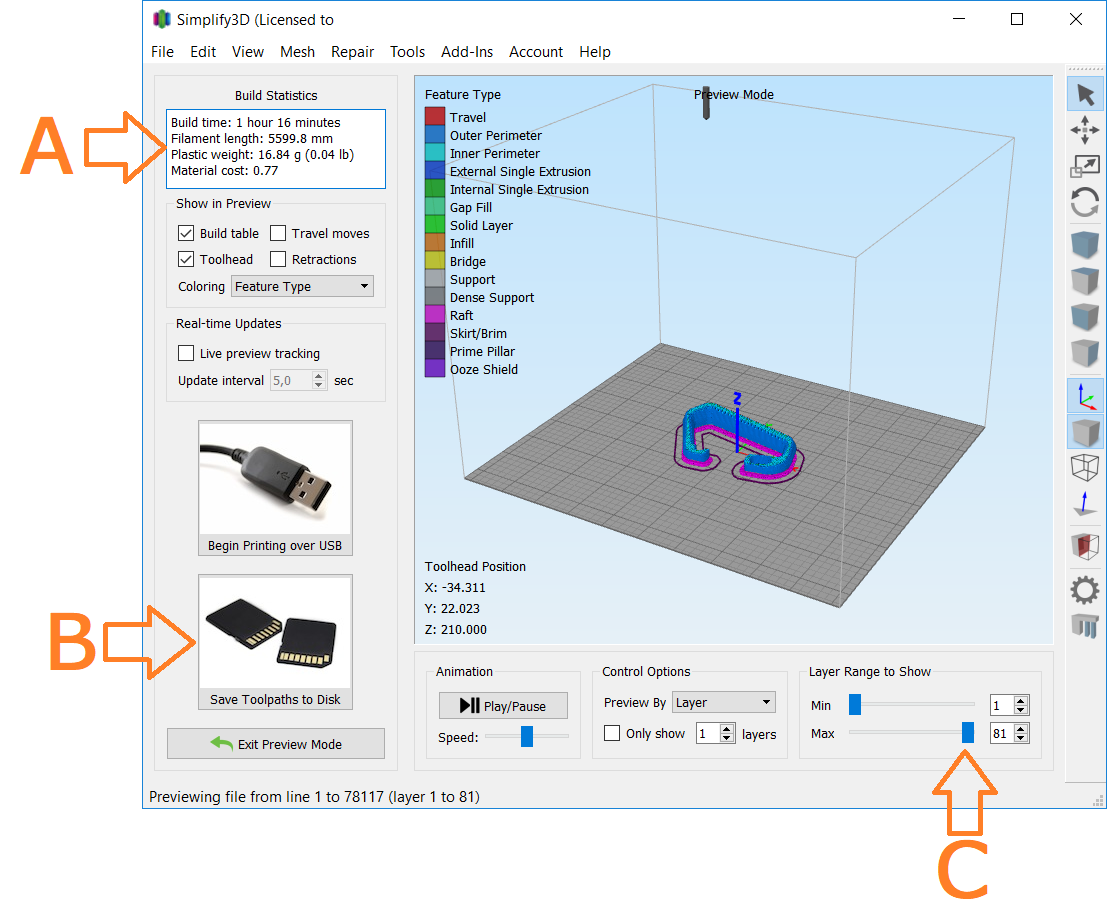
8. Viewing the sliced model and saving print file In this view, a preview is shown of what the print will look like. The sliced model can also be zoomed and rotated the result, just as in the previous 3D model view. There are also lots of other useful information as shown in the picture to the right. A: Estimated print time, material use, and cost. B: Saves the sliced model to the X3G format file for the printer. C: Allows a layer-by-layer preview of the print process.
Finish by clicking the B button and save the X3G file to a known place. We suggest that the file name also includes information about material and SwiftTool size. The file name is limited to 32 characters, so a short |
|
code suffix like "-P04" for proPLA with 0.4 SwiftTool or "-C06" for proCarbon with 0.6 SwiftTool allows more space for the description.
9. Copying file to SD Card
Finish the process by copying the X3G file to the SD card. Go to the Printing section to continue.
More details on the Simplify3D software is found at www.simplify3d.com. A Simplify3D Quickstart Guide is found at www.simplify3d.com/support/quick-start-guide/.
Please note that damage occurring due to deviation from our provided profiles (including printing without a raft) will not be covered under ZYYX Labs's warranty policy.
|
Due to limitations in the Simplify3D software it always ask you to save any profile settings that you have modified. Always click "No". If you by mistake click "Yes" we recommend that you to restore the ZYYX profiles by deleting and adding them again, as described in section Setting Up the Simplify3D Slicer Software and ZYYX pro Profiles. |