|
<< Click to Display Table of Contents >> Swapping SwiftTools |
  
|
|
<< Click to Display Table of Contents >> Swapping SwiftTools |
|
To replace SwiftTool it is recommended to use the built-in SwiftTool swap function. You will find it on the main menu of the ZYYX pro. It guides you with an on-screen step-by-step instruction and also helps by heating and cooling at the right times.
|
Make sure to hold the SwiftTool by the body, do not pull the cable to remove it. The cable may break if too much force is used. |
If you still want to do it manually, a step-by-step manual guide is given below.
1.Start by unloading the filament using the ZYYX pro main menu. If this for some reason is not possible, you may need to cut the filament using a pair of snippers.
2.Allow the SwiftTool to cool down for a few minutes, since the next step requires you to hold the SwiftTool.
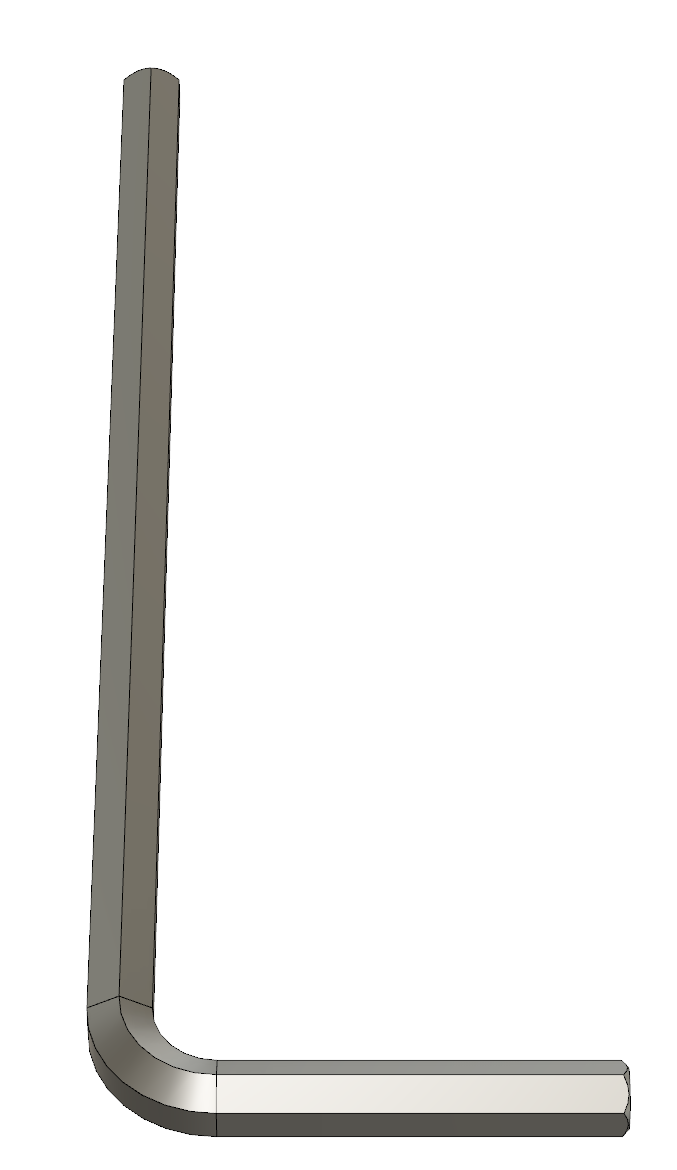
3.Locate the printhead and flip the front part to the right as shown below. Find the 2.5 mm Allen key (hex tool), as shown right.
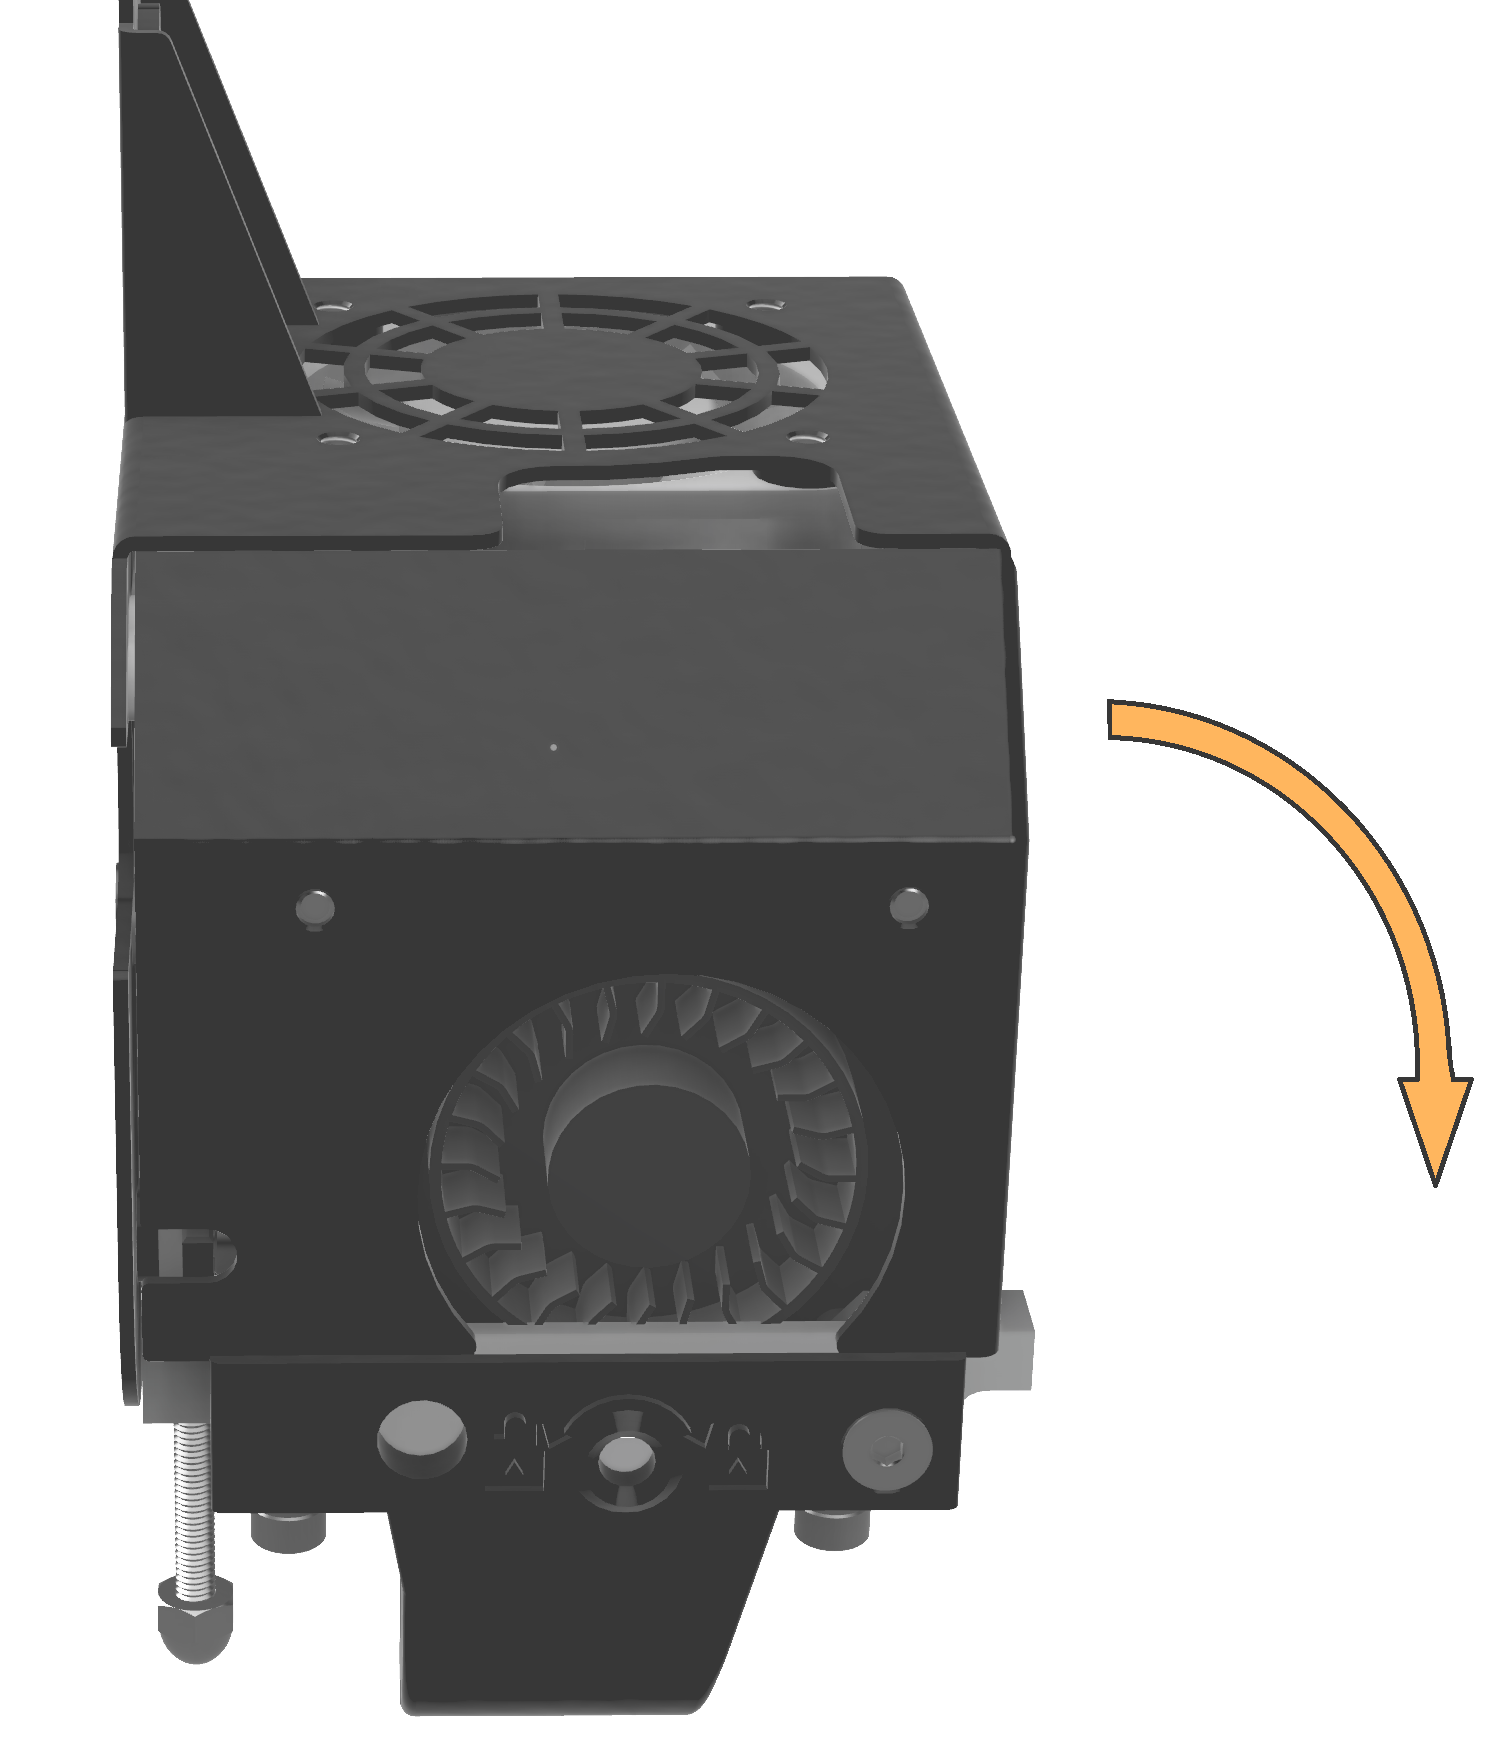
|
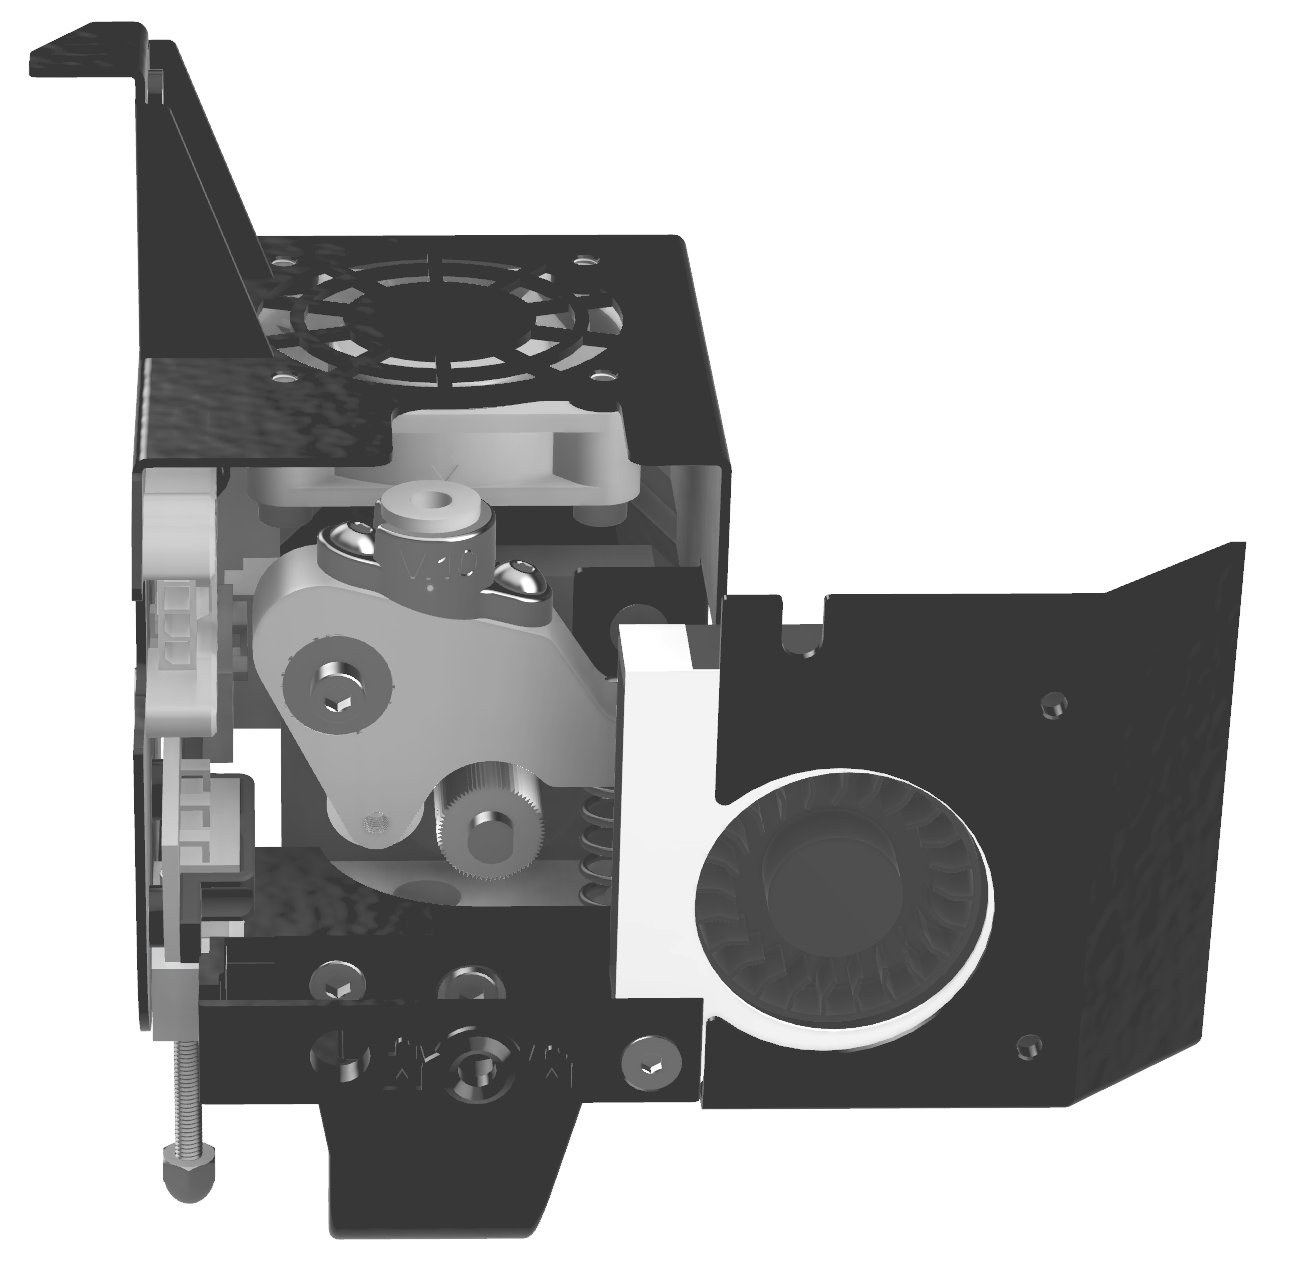
4.Insert the 2.5 mm Allen key (hex tool) into the hole in the plastic fan holder. Unscrew counter-clockwise until the screw hits the front wall of the fan holder. 5.Disconnect the SwiftTool connector by squeezing the lock tab on the SwiftTool connector and then pulling out. 6.When 4 and 5 are complete, the SwiftTool can easily be grabbed from below and pulled down or pushed from the top with a tool to come loose. It should be quite easy to pull out. If not, unscrew the lock screw some more. Never pull the wires! 7.Put the replacement SwiftTool in place by using the opposite procedure. |
|
Make sure to push the SwiftTool up while mounting the lock screw, or the SwiftTool may be mounted too low. This will result in printing problems. |
